
> Intro
• Create
— HDRI: Create —
Create an HDRI
A series of photographs are needed for an HDRI. The camera stays at the same place and one of the four parameters are varied:
- the diaphragm by a full stop (f/32 — f/22 — f/16 — f/11 — f/8 — f/5.6 — f/4 — f/2.8),
- the exposure time (shutter speed) is doubled or halved (1/4 — 1/8 — 1/15 — 1/30 — 1/60 second),
- different neutral grey-filters are screwed in front of the lens,
- the filmspeed is changed (100 ISO — 200 ISO — 400 ISO — 800 ISO — 1600 ISO — 3200 ISO).
- Waiting for the passing of time, until the sky gets darker.
A camera is needed that offers at least one of the features listed above. It is absolutely possible to create HDRI's from traditional chemical film. But this is tedious because it must be acertained that no brightness corrections are performed when the film is processed and a print made. Also, when the prints are scanned, the original brightness must be retained. A digital camera makes life much more easier in these respects.
Stability
Preferably, the camera is mounted on a stable tripod and if the shutter can be triggered using a
remote control, the much the better. The pictures must fit one above the other. Shifting the camera
ever so slightly between the individual exposures asks for a lot of additional work afterwards. It
pays off to handle things in a very careful way when the f-stop or shutter speed is changed for the
next shot.
Exposure
SLR (Single Lens Reflex) and DSLR (Digital) cameras feature the so-called
«Bracketing». The camera finds the best settings, takes a shot, dims by 1/3 to 2 steps,
takes another shot and brightens by the same amount and takes a third shot. This is already enough to
create an DRI (Dynamic Range Increased).
The serious HDRI photographer, however, does not consider this sufficient even though a series of pictures ranging over 32 f-stops is not striven for. Best practice is to aim for 8 to 15 f-stops for excellent results.
f-stops
In HDRI photography, we speak of f-stops. However, this does not mean that only the diaphragm
may be varied. Opening the diaphragm by a full stop, e.g. f/16 to f/11, corresponds to doubling the
exposure time, e.g. from 1/500 second to 1/250 second or a doubling of the film speed, for example
from 400 ISO to 800 ISO (which can be adjusted on the fly on digital cameras and actually just
changes the amplification factor of the readout electronics). The easiest way is changing the
exposure time because there is the widest range readily available — typically from 30 seconds to
1/8000 second (18 steps) while the diaphragm can be varied by 10 stops (f/64 to f/2) in the best case
and the film speed has an even narrower range of 6 steps (100 ASA to 6400 ASA). As for the filters:
their range is limitted by your budget to purchase filters and fix them in front of the lens…
Animated Objects
It is obvious that you cannot create an HDRI from racing cars streaking past the lens of the camera.
People usually move around and will appear as smears or ghosts. HDRI photography is limitted to
still objects. Clouds may perhaps move too fast over the sky and photographing vegetation —
trees and flowers — should not be attempted on a windy day. A soft breeze may be too much
already. Wideangle photos are less delicate than zoomed-in ones; objects far away apear not to move
so fast as near ones.
Example
Now to illustrate what has been elaborated, a series of photographs that could be assembled successfully
to an HDRI.
-
8 s
4 s
2 s
1 s
1/2 s
1/4 s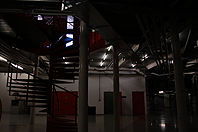
1/60 s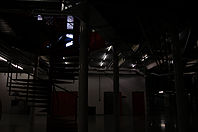
1/125 s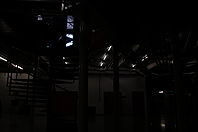
1/250 s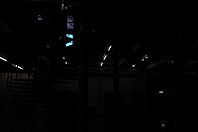
1/500 s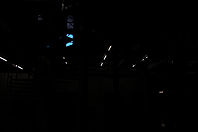
1/1000 s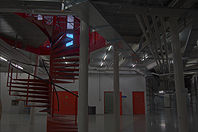
Linear tone-mapped
The last picture is the HDRI, combining the 14 pictures before it. The exposure times used correspond to 13 f-stops, calculated were 17. The dynamic range is 158,873:1 and the maximum radiosity is 276 (radiosity is a parameter that is important if an HDRI is to be used as a light source for image based light for 3D computer graphics).
The HDRI was linear tone-mapped for display. This means that the dynamic range was linearly squeezed down from 158,873:1 to 256:1. Even though the picture does not appear particularly successful we have to admit that there are neither too dark nor overly bright parts in it (look at the fluorescent tubes and the blue sky outside). Nevertheless, there is still a lot of potential to extract from this picture as will be demonstrated under the topic «Tone-mapping».
How the pictures are merged to an HDRI
A program to do so is needed. It reads the series of pictures and adds up the brightness and
colour values for each pixel and displays the result (usually) linear tone-mapped. The programs differ
considerably in what features they offer. Some are able to adjust slightly shifted pictures
automatically, others permit manual alignment and still others do not have such a feature. Some
programs read the EXIF data from the JPG photographs, others demand that the exposure values are
entered manually, still others have a tool to calculate the camera response and save it. This curve
can be used as a reference for the HDRI creation. Not all programs are freeware.
At this stage it is adequate to point out that JPG-pictures from the camera usually were tempered with and the image data is available only in 8 bit per pixel. If the camera can save raw (RAW) images, the camera should be set to save the images accordingly. A special ptogram from the camera manufacturer may be needed to convert the raw images into a standard format that can be read by any image application. Raw images usually have a dynamic resolution of 12, 14 or 16 bit. Already with 12 bit resolution, a series of pictures in 2 exposure value (EV) steps instead of one suffices nicely, which halves the number of pictures for the series.
Programs
Things are changing, programs disappear, new ones emerge, options are added. Once there is an
interest to embark on HDRI photography, that would be the moment to look around the Internet
what is available. Some programs I know and worked with at one time or another, partly in earlier
versions:
- HDRShop is a classic for the PC. The free version 1 is not available anymore. The rather expensive version 3 is still a 32 bit application.
- Picturenaut is
still available for the PC only but work on a Mac version is in progress. Picturenaut has many
options but is still quite easy to manage and it works reliably.
• Banty's Toolkit can be integrated into HDRShop and Picturenaut and is free. - Luminance HDR, previously known as Qtpfsgui is free and available for the PC, Mac and Linux.
- Photomatix is available for the PC and the Mac and has a price tag of around $100 but there is a free test version.
- Fhotoroom was previously Artizen and there is now an App with a very modest price tag which permits to process the pictures via cloud on their website.
- HDR Expose is available for the Mac and PC and costs around $120. HDR Express is limited but cheaper, around $80.
Convenient accessory
A stable tripod is mandatory if you wish to make HDRI photographs. Another — rather
unconventional — accessory is the Gorillapad «Joby».
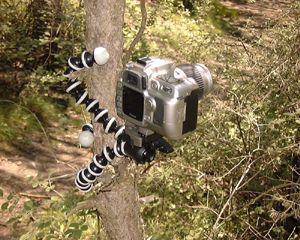
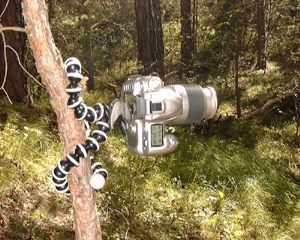
Less laborious and bulky to carry around than a tripod. Simple to fix on a tree or a lamp post. However, not cheaper than a cheap tripod — particularly if the Joby is equipped with a fast camera mounting plate.
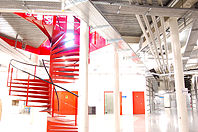
Waiting for the time to pass …
This undocumented method cannot be found in any textbook about HDRI and is, of course, a joke.
Nevertheless, it works, but only during the periods of dawn and dusk. Study from the balcony
with a fisheye lens …
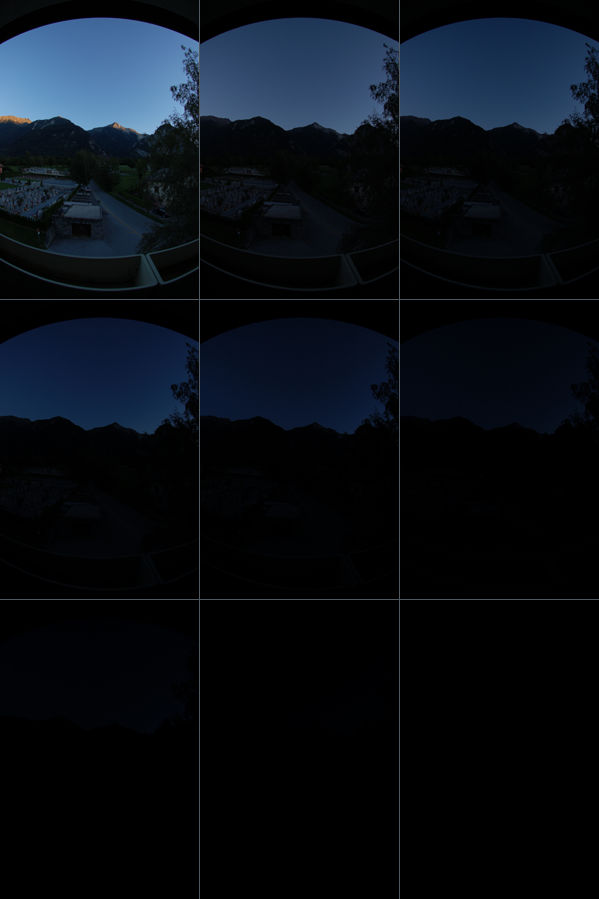
The picture on top left was taken with automatic exposure: f-4, 1/250 second at ASA 200. Then I waited until it grew so dark that I would have to use about the double exposure time at the same f-stop, but took a photograph with 1/250 second nevertheless. I continued this. Here are the values:
3. August 2008. f-4, 1/250 s, 200 ASA Time
(CEST)Exposure time
ought to be (s) | HDRShop (s)Time
(CEST)Exposure time
ought to be (s) | HDRShop (s)Time
(CEST)Exposure time
ought to be (s) | HDRShop (s)20:40 1/250 | 250 20:58 1/80 | 80 21:02 1/50 | 50 21:06 1/25 | 25 21:09 1/15 | 15 21:14 1/8 | 8 21:18 1/4 | 4 21:23 1/2 | 2 21:26 1 | 1
The pictures were loaded into HDRShop and as absolute scale I gave the inverse values; e.g. for 1/250 second 250 seconds (see table). The HDRI got a dynamic range of 136,203,908 : 1.
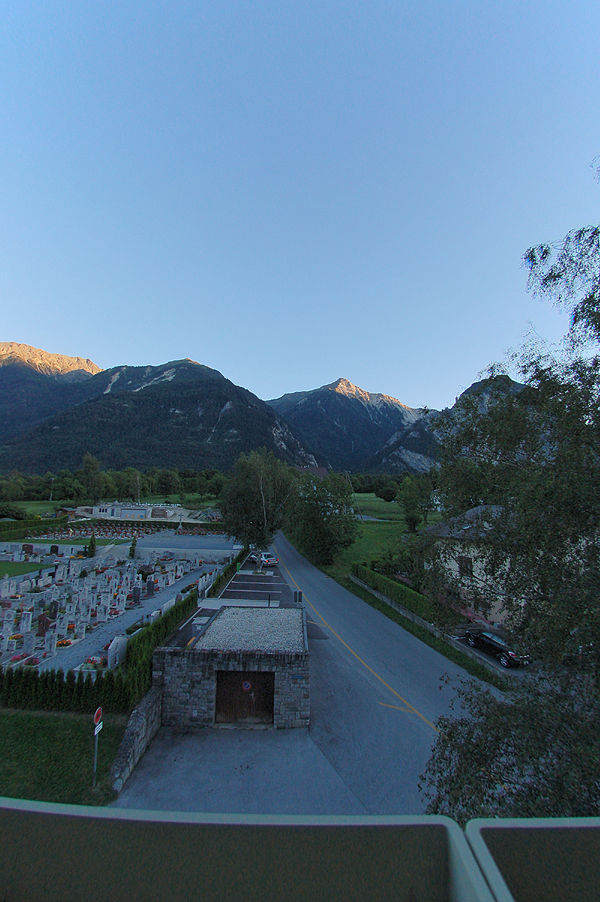
The pixel values were multiplied by 10 and the tone-mapping done as follows:
- 1. In Picturenaut 2.12 with the Photoreceptor Physiology Operator
- Exposure adjustment: 3.00,
- Dynamic compression: 0.00,
- Saturation: 0.500,
- Contrast: 0.500,
- Gamma 2.500, Rec. 709 not ticked.
- 2. In Artizen 2.60 beta2, with the Dramatic Operator
- PreGamma 1.50,
- Brightness -4.00,
- Saturation 0.25,
- Strength 0.25,
- Soften Detail 0.50,
- Fine Detail 0.50,
- Contrast 0.00,
- Highlights 0.00,
- Shadows 0.50,
- Midtones 0.50.
Both pictures were then loaded into HDRShop and added. Finally, the picture was «defished» using PTLens. I sat there and I had this impression when I shot the first picture. A huge success ;-)
© 2004 - 2018 by Horo Wernli.